Stretching the pizza dough at the end is a good way to concentrate on parts of the dough that need to be stretched more and are not thin enough.
Stretching a Pizza Dough
Margherita pizza, the archetypal pizza, was said to be invented in 1889. This dish, topped with Mozzarella and tomatoes. It used to be known as the poor man’s dish. But it later became famous for the wealthy when Queen Margherita enjoyed it.
Italian immigrants in the United States introduced sauces and spices such as basil and garlic to it and allowed it to gain recognition in the rest of the world. This Italian food item spread to all corners of the world thanks to American initiatives.
Originally, pizzas were made in Italy with Mozzarella and tomatoes. But they were later topped with other ingredients similar to today, like Neapolitan pizza. The popularity of this food item has spread quickly. It has become a family dish that people of all ages enjoy.
A pizza’s greatest strength lies in the dough and the way it is cooked. In spite of the fact that pizza base is a matter of taste, some chefs recommend that the dough be as thin as possible. Rest believe that focusing more on the toppings rather than the pizza base can yield a more delicious product. In order to ensure that the pizza crust is cooked evenly, it should be placed in the center of the pizza oven. It is also important to note that the ingredients should be cooked simultaneously with the dough.
What is a Pizza Dough?

The dough used for pizza is made from wheat flour, and it is shaped or rolled into a disc, round, or rectangle shape. A topping of tomato, cheese, meat, and vegetables is then added to the dough, which is then baked at high temperature.
The Importance of Fermentation
Bulk fermentation can be used to raise dough in some pizza base recipes used in Youtube videos. This occurs when yeast cells consume glutamine and exhale carbon dioxide, causing the dough to rise.
Fermentation produces air pockets within the dough, which gives the crust a textured, flavourful appearance. When the fermentation process has been completed, the dough will be shaped then it will be proofed. This is called final rise to get the desired circle shape.
Related Article : Tips in Making the Best Pizza Dough
Steps in stretching a pizza dough
When you search for stretching pizza base on the internet, it may seem intimidating to those new to the craft at first. It doesn’t have to be! For beginners who have never made this family dish before, below four steps are ideal for learning how to stretch pizza dough. They should repeat these steps until they learn how to stretch the dough properly.
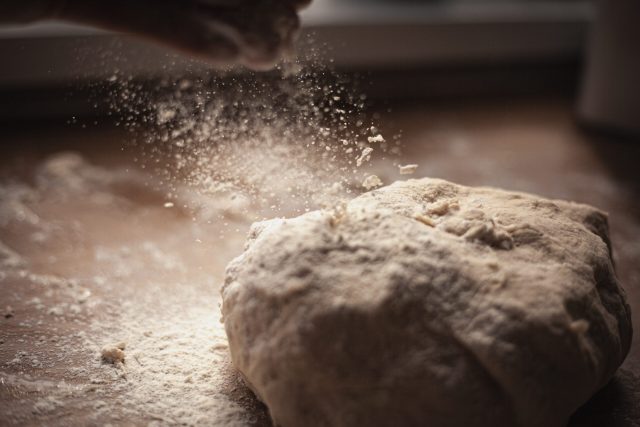
Before you start this process, you should remove your watch, rings, and any other jewellery from your hand. This will prevent your dough from becoming stuck on your jewellery when you stretch pizza dough. Furthermore, you should generously dust your workstation with flour or semolina. But before stretching the dough, we recommend that you warm it up at room temperature for a minimum of 30 minutes.
Step 1. The Finger Press

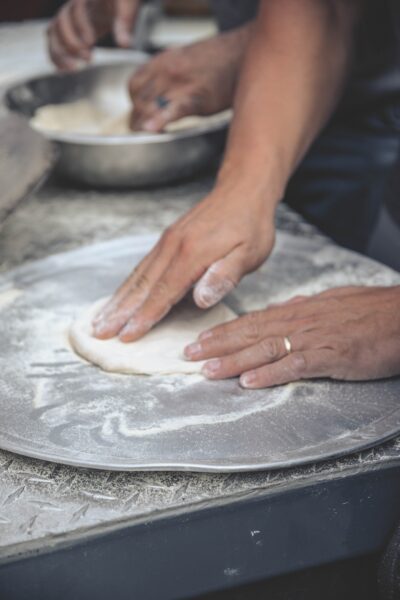
When it comes to stretching, the first step is to do ‘the finger press’. The dough balls should remain flat on your work surface while you are gently pressing into it with your fingers. Gently push your fingers apart to stretch the base outward as you continue to press the dough ball.
When stretching out the base of the pizza dough, try to keep it as circular as possible so you can get the desired circle shape. The best way to define your crust at this point is to leave around a half-inch or one inch of dough around the edge of the base untouched.
Step 2. The DJ Deck

The next thing you can do once you flatten out your dough is to use a technique called ‘The DJ Deck’. It will be useful here to put your hand flat onto the dough disc while pulling your hand apart.
There is no right or wrong way to turn and press the pizza. It is okay to flip it however you desire. During spinning the base, make sure you are pulling in opposite directions with your hand. To achieve a smoother, more even base, you need to make the base wider and flatten any lumps.
Step 3. The Steering Wheel
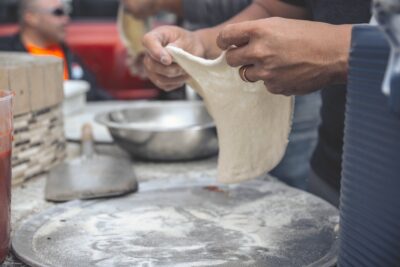
Next comes ‘The Steering Wheel’. This is where gravity comes into play. Helping make the pizza base even bigger and thinner. As you rotate the dough, grab the edge of the base and let it hang down like a curtain.
During the rotation, pinch the top edge of the dough gently. If the dough is not too thin when you start this process, you probably won’t have to worry about it ripping. The dough has a very strong structure.
It is possible to pinch the dough from the edge or to handle a larger section closer to the center of the oven. It depends on how big you want the base to be. Furthermore, you’ll be able to control how high the crust gets once it’s cooked. Here, you should start checking if the dough is evenly stretched.
Make sure the stretched base is translucent by holding it up to the light. If you are making a Neapolitan pizza, you want the base to be quite thin so that you can see quite a bit of light through it.
Step 4. The Parachute

This is the last step for stretching your pizza dough. It’s called “The Parachute” because the action you’re going to do mimics that of opening up a parachute. Put your hand in a curved position, like you would when holding a cup. Adjust them so that they fit together, then simultaneously lift both of your hands upward. Make this movement slowly over the stretched dough as you continue to take it off your hands.
Using this technique at the end is a good way to concentrate on parts of the dough that need to be stretched more and are not thin enough. Tearing is possible in the dough when you stretch pizza dough too far. If this occurs, simply mix them together again with one hand. Repeat these steps to enhance your skill in stretching the dough.
Tips for Stretching Pizza Dough

1. Bring your dough to room temperature
It is recommended in any recipe that you warm up the cold dough at room temperature for a minimum of 30 minutes before dough stretching.
A cold environment like the fridge makes gluten easier to break, and that is why cold pizza dough stretches out and snaps back like a rubber band. The pizza dough will be easier to work with once it’s kept at room temperature.
If the dough is in plastic from the grocery store (or freezer, you champ!), remove the plastic from it and place it in an oiled mixing bowl. Let the bowl sit for at least 30 minutes at room temperature.
In the case of homemade style dough like experts, you will begin this process after you have let the dough rise for 1 1/2- to 2 hours and then divided it into two round portions as mentioned in the recipe.
2. Prepare your workspace with olive oil to avoid sticking
So now there’s a bowl of pizza dough waiting in front of you, and now you’re ready to stretch pizza dough out. It is important to skip the flour in this trick.
When too much flour is used, pizza dough can be tough. Most doughs will stick without flour. Use olive oil instead (about 2 to 3 tablespoons) on your work surface and hands.
A golden and crispy crust like Neapolitan pizza is made possible by olive oil, which keeps the dough from sticking to the board, pan, or hands.
During this time, you may also line your pizza peel (or the back of an inverted sheet pan) with parchment paper or sprinkle it with cornmeal to prevent tearing.
3.Stretch the dough with both hands and use gravity.
You shouldn’t stretch the dough with your hands and toss it in the air. If you want to learn how to stretch pizza dough, no matter how impressive it may look avoid that. To achieve an even crust, keep the pizza dough close to you and use gravity and stretch it with your hands.
When you are ready to stretch the dough, pick it up and carefully hold both end edges together. Then letting the rest of the dough hang down. When I am making pizza dough, I like to have the top crust towards me so that I can keep track of how thick it is.
As you gently turn the dough in one direction, like turning a wheel, gravity will do some of the stretching work. And finally, pull the dough slowly from one hand to another hand while it hangs down.
Follow these 3 tips to properly stretch your pizza dough in homemade style. Arrange a grand ball as your successful venture with the delicacy calls for a celebration.
Related Article : How To Defrost a Pizza Dough
Final Thoughts

This food item is often recognised as an easy meal. Some people often claim that cooking pizza can be easily done at anytime at home. The answer is yes in many ways, you can cook it. It is easy to make thick pizza dough!
Right?
And once it is washed and rolled out, it is just a matter of toppings and baking in the oven.
However, I consider the stretching of dough a painful point. To make the stretching pizza of the dough much easier, I challenged myself this winter to make a better one at home. And the rest is a secret. It’s important to remember that the main thing you need when stretching pizza dough is to relax and have confidence.
It takes practice to learn how to stretch pizza dough. But with a little effort, you will achieve the excellence of a chef and know how to cook it. So, have fun while you learn this stretch the dough skill.
Now that we’ve learned how to stretch a pizza dough, how about spinning it?
Click here to know how to Spin a Pizza Dough
The post How To Stretch Pizza Dough in 4 Easy Steps appeared first on Dumb Little Man.
0 Commentaires